Steps to Sync Appfolio (4 minutes)
There are two ways you can start your sync with Appfolio for your Utility Profit platform.
When you first set up your account during onboarding you'll be prompted to integrate your software.
If you decide not to sync during onboarding you can still choose to do so once your platform is activated.
You'll see this notification above the Utility Activations dashboard if syncing is not set up.

Click "Activate Sync" and select Appfolio from the drop down menu.
Below we will discuss the steps to sync with Appfolio.
First, go to your Appfolio.
Create Report
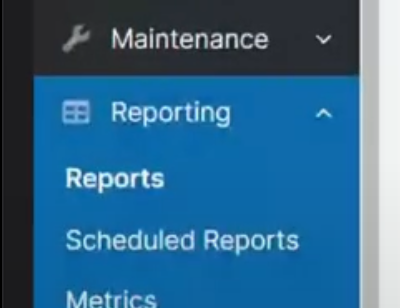
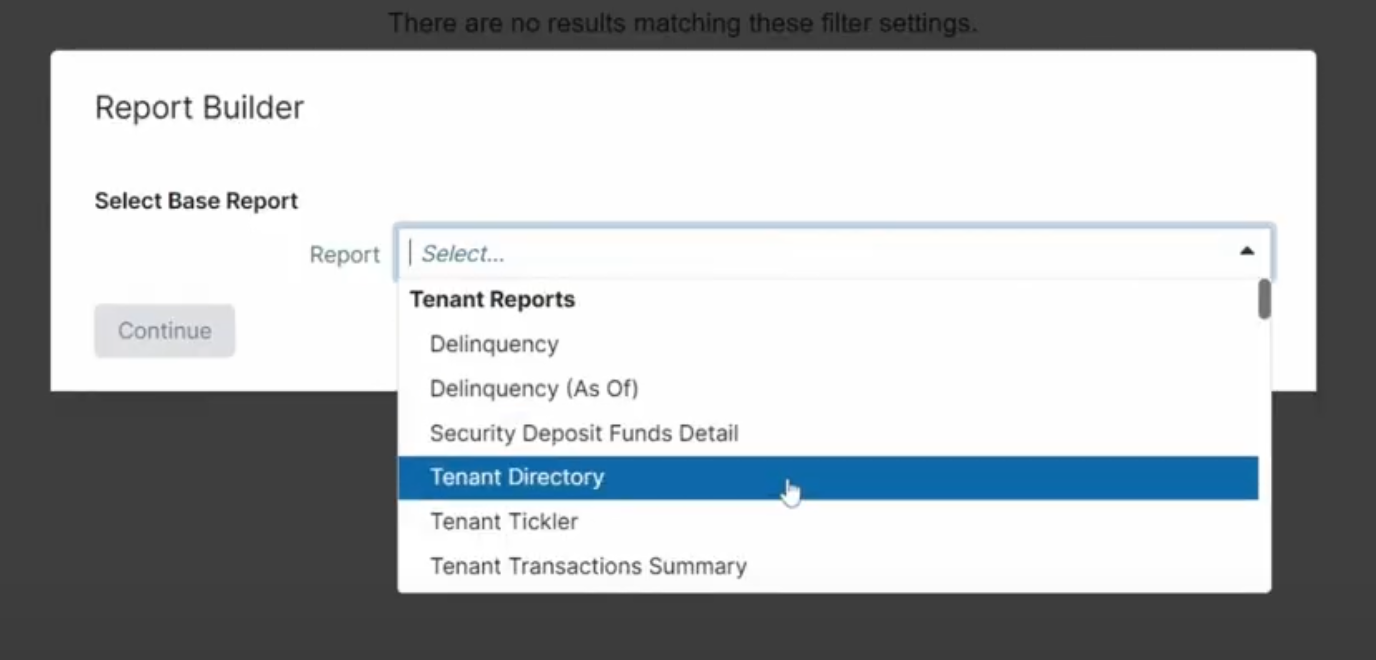
In the ‘Reporting’ tab on the left navigation, click “Reports”
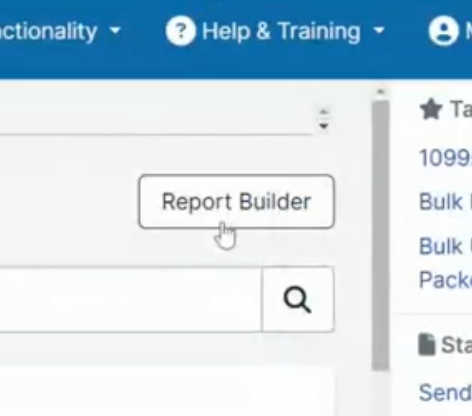
On the top right, click the white button “Report Builder”
In the ‘Report Builder’ dropdown, select “Tenant Directory” and then click “Continue”

Don't change the top checkmarks. Go to the very bottom ‘Add Columns’ section, and expand “Unit Directory”
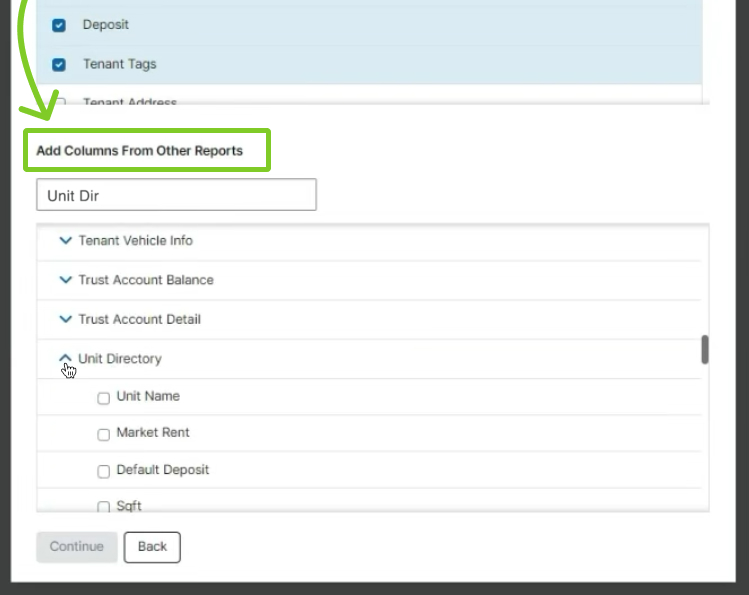
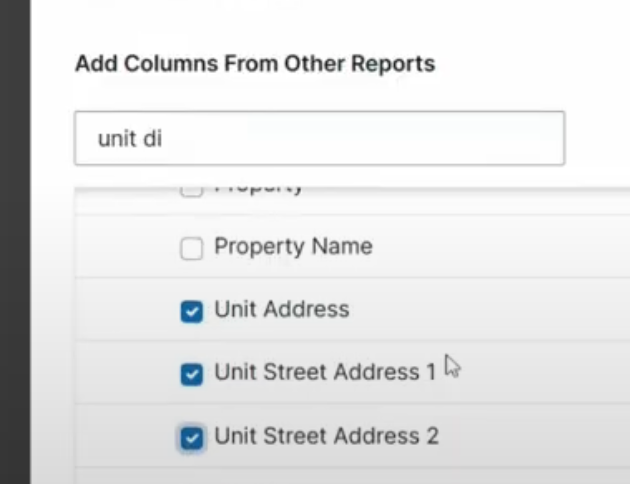
Check on all of these:
“Unit Address”
“Unit Street Address 1”
“Unit Street Address 2”
“Unit City”
“Unit State”
“Unit Zip”
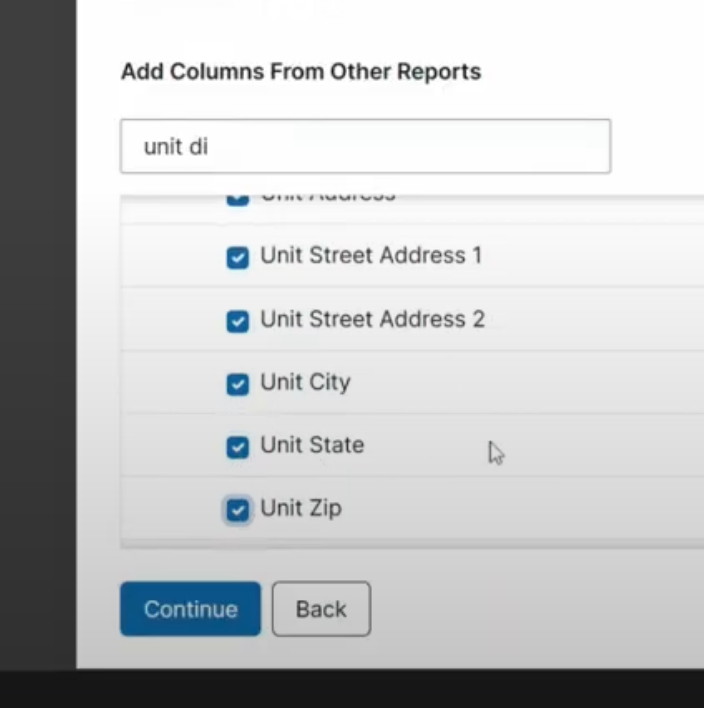
On the bottom left, click “Continue”
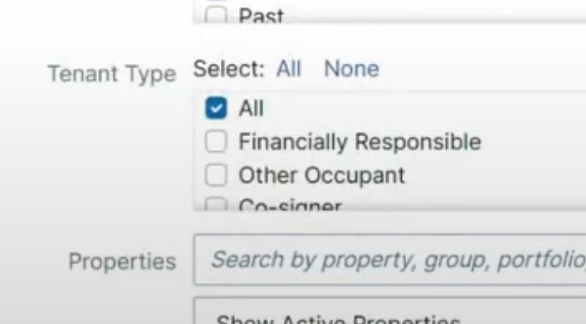
In the ‘Tenant Status’ check on “Future” and check off the others
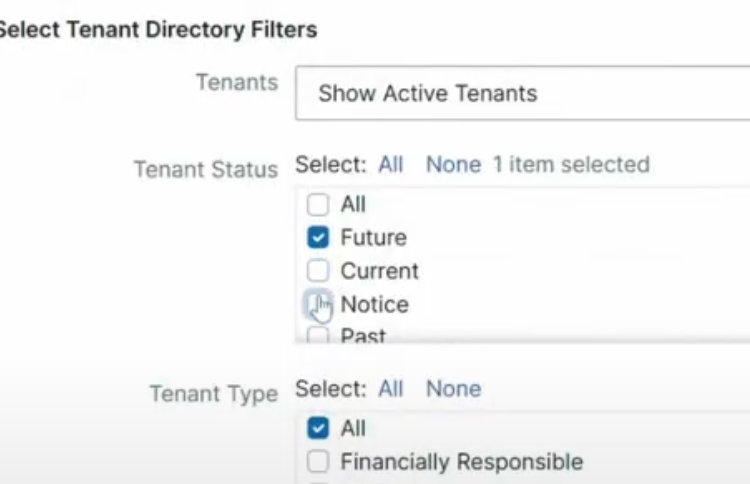
Keep ‘Tenant Type’ on “All” (some people in the household are more responsible than others).
On the bottom left click “Update”

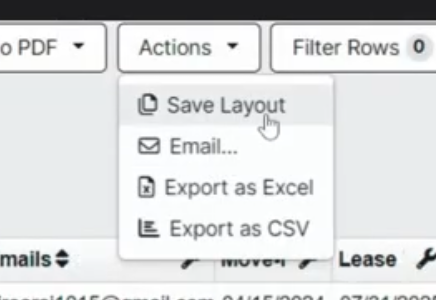
On the top right click the white button “Actions” and then click “Save Layout” (remember the name for later!).
Go back to your other Appfolio tab.
Schedule Report
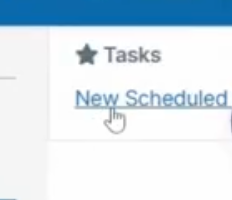
In the ‘Reporting’ tab on the left navigation, click “Scheduled Reports”

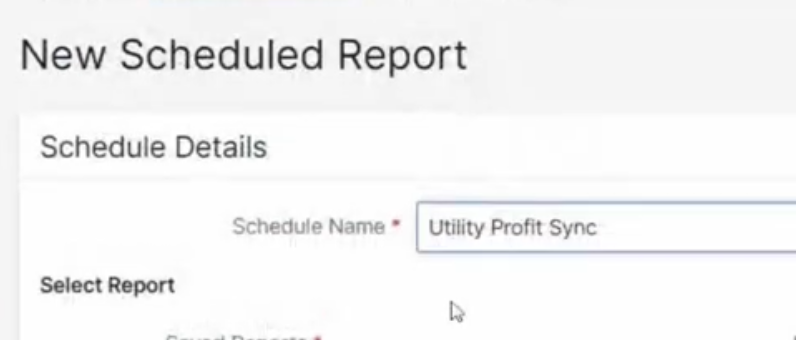
On the top right, click the blue link “New Scheduled Report”
Name it whatever you want (Example: “Utility Profit”).
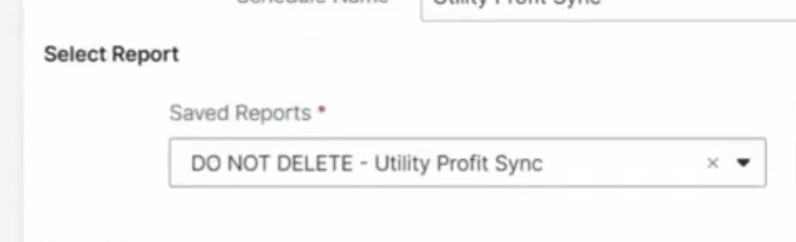
In the Saved Reports, select the report we just made.
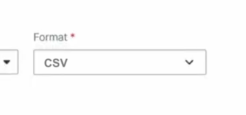
For the Format, select “CSV”
In the Recipients, type in this email address and then click on it “sync@utilityprofit.com”
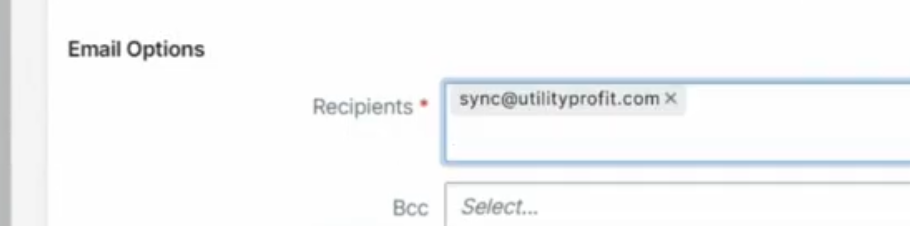
Appfolio requires at least something in the message field, it can be anything like “Hello.”
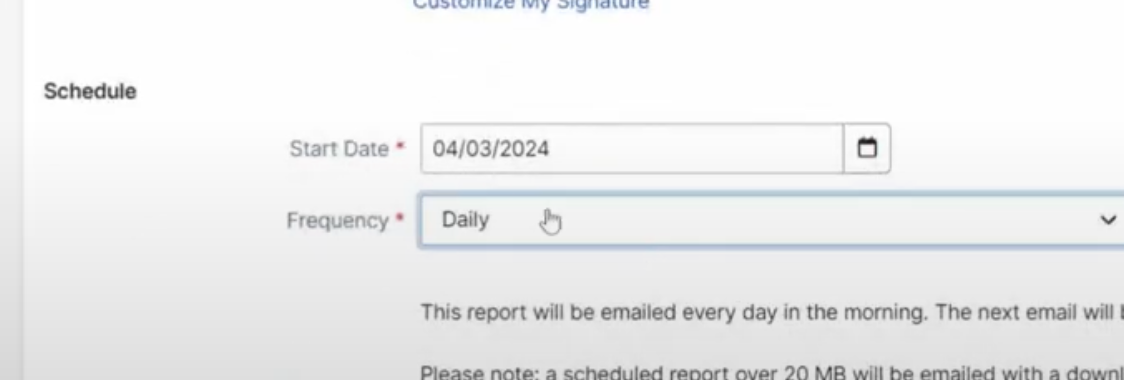
In the Frequency, select “Daily”
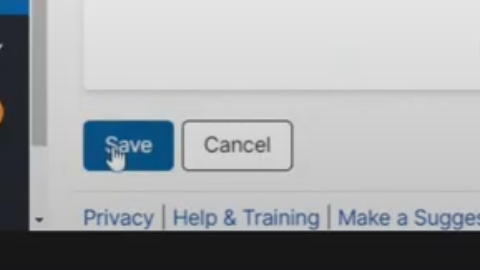
On the bottom left, click the blue button “Save”
Important: If you are switching from a different utility concierge to Utility Profit, make sure to search for and turn off any scheduled reports to the other concierge that you may have.
Validate the Report CSV
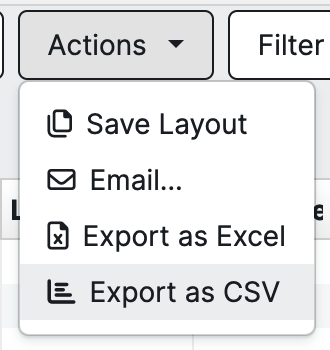
Navigate back to your other tab with the report builder (the report you just built). In the "Actions" dropdown, select "Export as CSV" and save it to your computer.
Once downloaded, use this Utility Profit page to the left, click "tap to upload" and choose your report CSV you just downloaded.
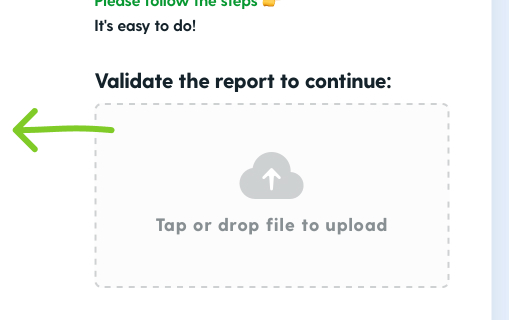
Your CSV must be validated to continue onboarding. If the CSV is not set up correctly, please make sure you have checked on all required fields we mentioned above. If you successfully fixed your CSV, remember to "Actions" -> "Save Layout" so that you overwrite the previous failing report!
For live support, please email us at accountmanager@UtilityProfit.com (9am-5pm, Mon-Fri)
If your report CSV validates successfully, then you're done!!
Wohoo! 🎉
Tenants will now be automatically notified to use your utility setup tool.