
How to Enable and Disable Utilities for Synced Listings
To ensure a seamless experience for your tenants, it’s essential to define the utilities they need to enable or disable when moving into their new home. By clearly marking which utilities are required for each property, you can help tenants set up their services without confusion.
With Utility Profit, this process is straightforward and efficient. Once you’ve set the required utilities for a property, the information is saved for future use—saving you time and effort. Let’s walk through how you can configure these settings to streamline the setup process for your tenants!
Step 1: Login and Navigate to Synced Listings
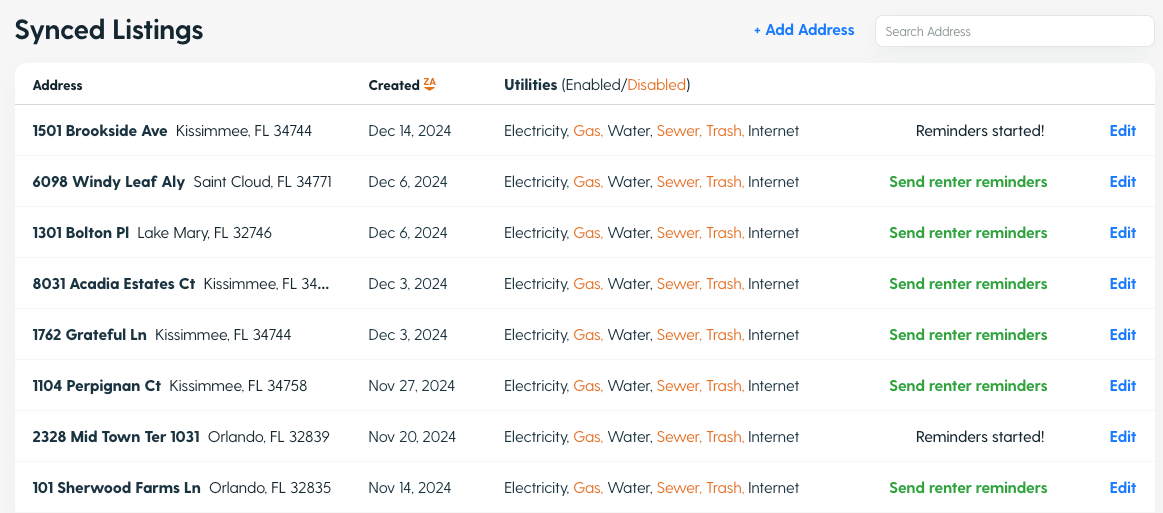
Login to utilityprofit.com and navigate to your synced listings section.
Step 2: Click Edit on the Address
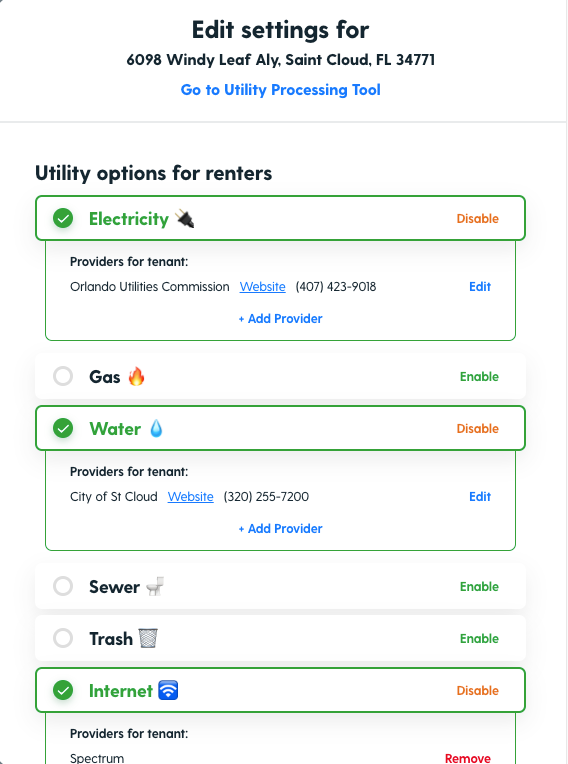
You may need to do this for each address after first onboarding. Select an address and click "Edit" to be taken to that addresses "Edit settings" page.
Step 3: Click Enable or Disable for Each Utility Type
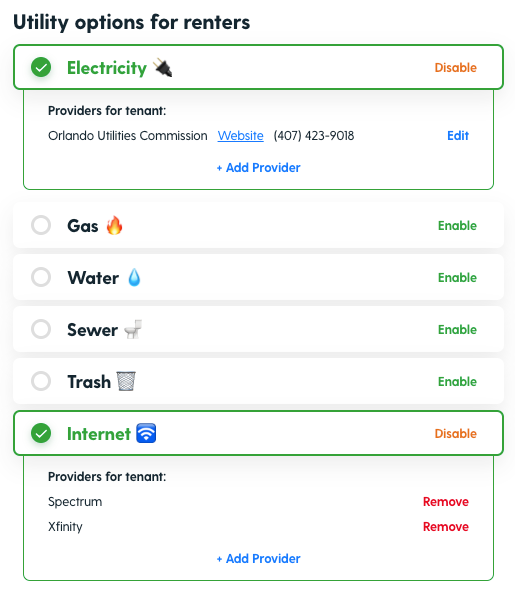
To set utility requirements for the address, click enable or disable for the utility type.
Note: We recommend leaving Internet enabled. It is best to disable Internet if it is included in the rent, or is apart of a bulk internet set up. (Internet is not a required utility)
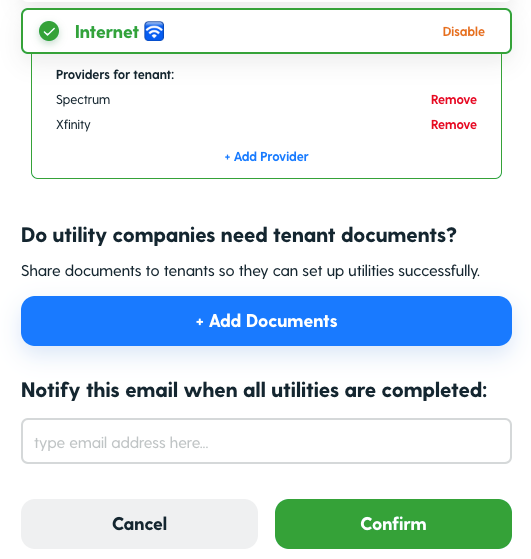
Step 4: Click Confirm
Once you click confirm the listings utility requirements will be saved for each future move-in!
Setting utility requirements ensures a smooth process for your tenants. If you have questions, our support team is here to help!
Reach out to us here for more assistance.